You might already know about Twitch, the streaming platform originally for gamers which now welcomes all kinds of streamers. Today content ranges from gaming, cooking, to singing and dancing! LUL
As a long time explorer of the “Twitch-verse” and “serial developer”, when Twitch announced the possibility for developers to create Extensions and distribute them directly on Twitch, I had to get involved!
Get ready for some quick tech insight.
The first opportunity to work on a Twitch Extension came from Metamancer, a good friend of our CEO at Black Pug Studio. They both worked for the critically acclaimed MMORPG: Star Wars: The Old Republic.
The idea was simple: create an extension that would allow Role-playing Game Masters to dynamically manage their character sheets and display them as an overlay on top of the stream alongside players’ webcam.
After a few months spent working on implementing the extension features and creating a full back-end to manage users and requests, the extension was finally released as Roleplay Character Sheets. Shortly after its successful release, we also added the option to display players information as a panel as well as the overlay component.
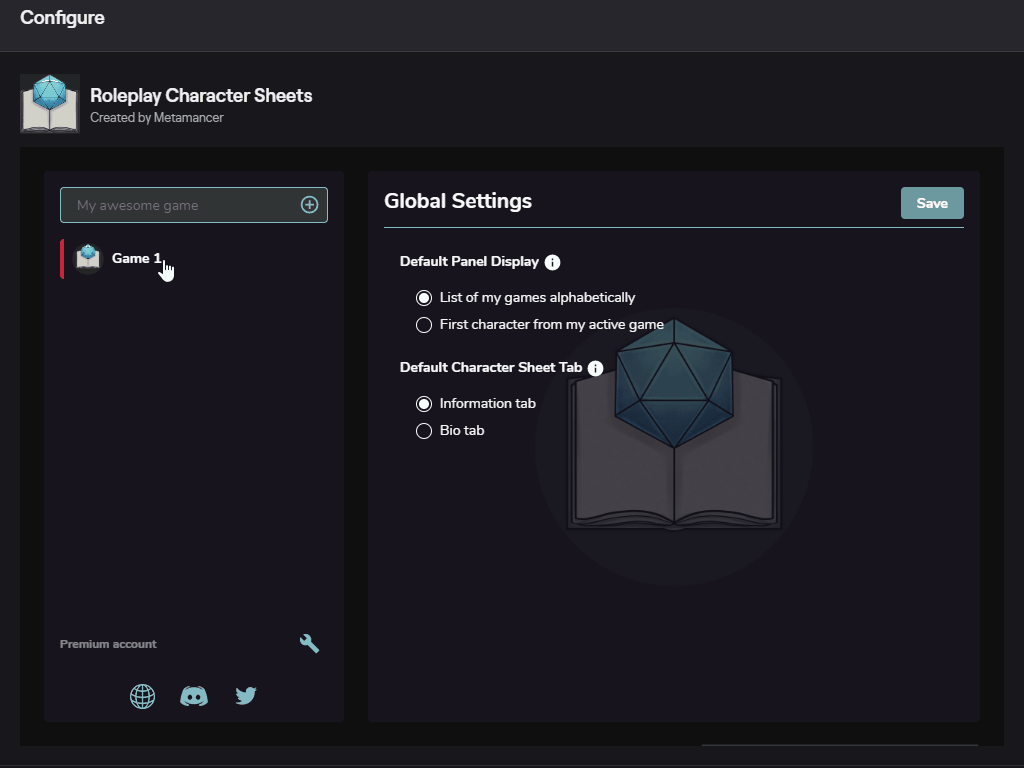
The team is currently working on additional features that will be coming very soon, as the community keeps growing, so check it out!
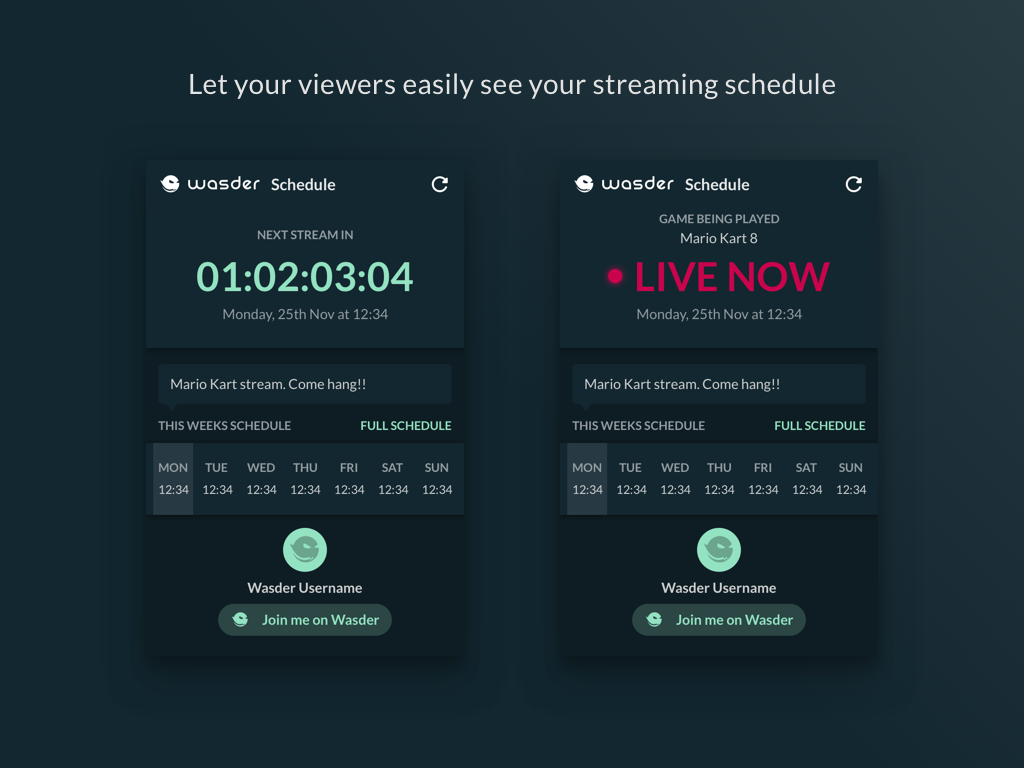
Recently, a gaming company approached Black Pug Studio to build a Twitch Extension for their brand new Gaming Social platform: Wasder.
The extension connects with their platform to display the streamer’s schedule in a comprehensive and straightforward panel view. Streamers can directly, through the extension config panel on Twitch, configure their schedule and edit a message pushed to their connected social channels when they start streaming!
You can find the extension on the Twitch Extension Store too! Let us know what you think! ;)

Now, I would like to guide you through the development of a Twitch extension. How it’s done. What I learned. And some insights, tips, and tricks I found along the way.
But first, let’s start with the very basics.
What’s a Twitch Extension? #lore
The clever Twitch Gods were scratching their heads, trying to find a way to add cool features to their platform. It was surely going to take time and resources to build them, and without any guarantee of success.
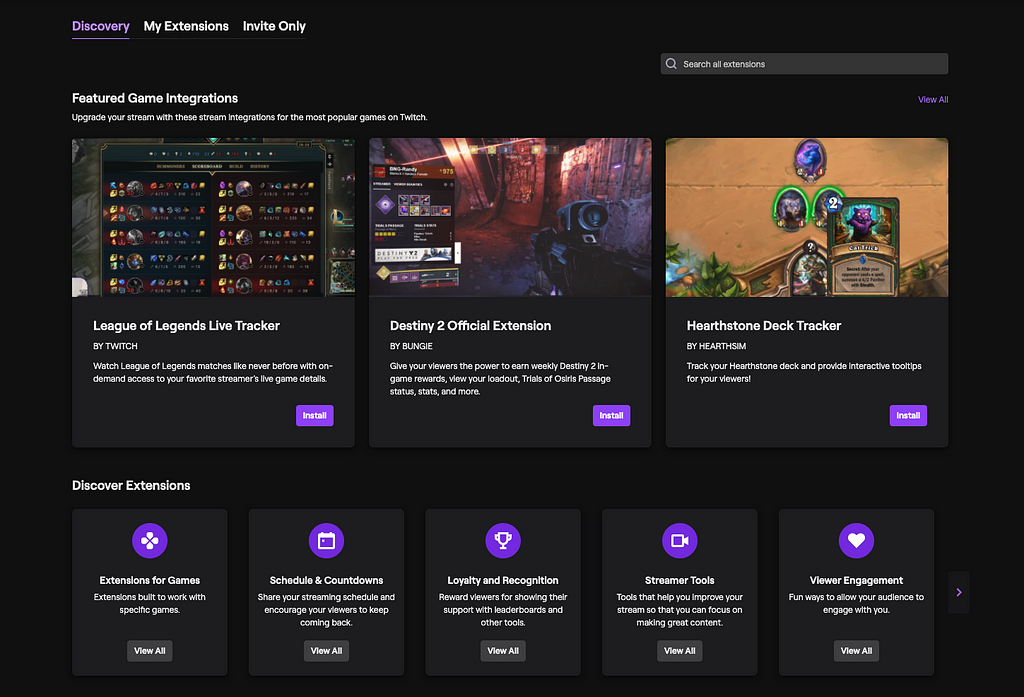
They decided to harness the power of their dev community and gave them the tools to create new features to extend the platform and distribute them through the powerful Extension Store! PogChamp
An extension is composed of a Config Panel accessible to the streamer only, and one or multiple front-end components (Video Fullscreen/Component, Panel, Mobile).
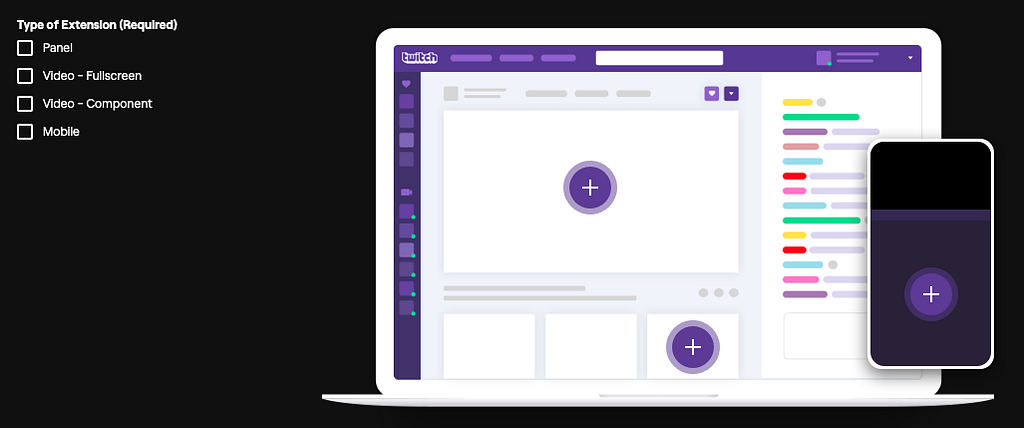
If you want your extension to act as a stream overlay, then select the Video Component option. Note that your video component can cover the entire stream (Video — Fullscreen) or display a small panel over the stream (Video — Component).
A Panel can be added as one of the displayed panels below the stream. The streamer can add multiple extensions as panels.
Finally, if you want your extension to be displayed on mobile, you’ll need to create a Mobile Component. Technically, it is very similar to a Panel Component.
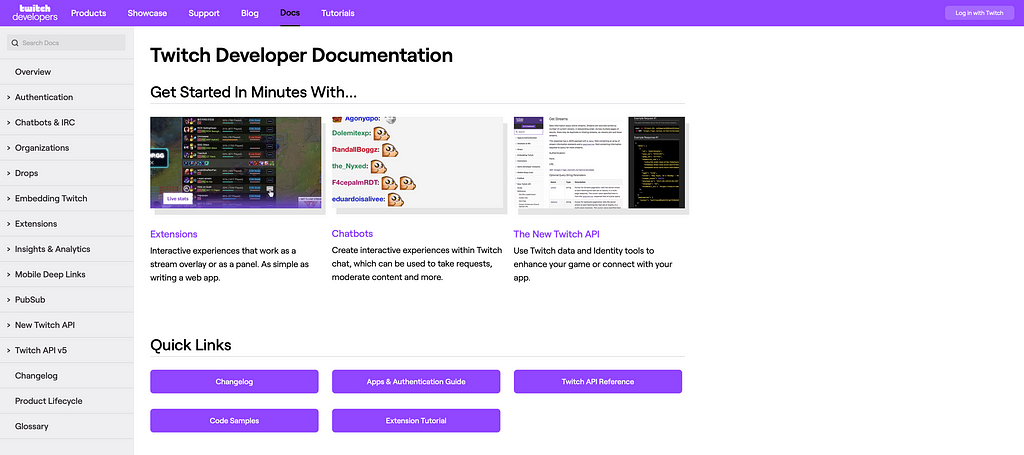
Get Started
First, you can head over to the Twitch Developers website and explore the Documentation about Extensions. Once you’re up to speed, create your first extension, and get ready to code!
When it comes to your environment, there are a few different ways to build an extension. Let’s explore some of them.
Twitch Dev Sandbox
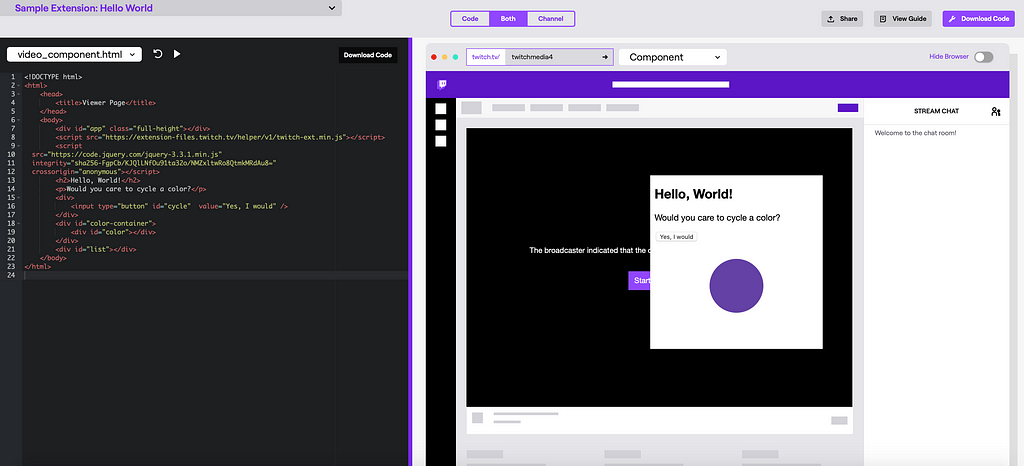
You can start building instantly with the Twitch Dev Sandbox. It’s an easy way to get started and understand how an extension works. You can play around and download your code if you would like to go further, as this solution is fairly limited.
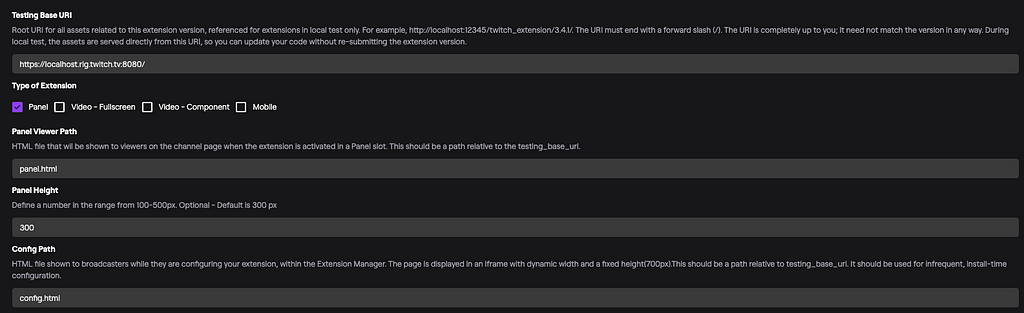
Twitch Developers Rig
If you want to start coding straight away and you don’t have any specific setup you prefer to use when it comes to working on a project, you can consider using the Twitch Developers Rig. This tool provides you with a development environment tailored explicitly for Extension Developers.
The Rig reads your project settings and serves locally your config panel and front-end components supported by your extension. You can preview changes instantly as you’re coding, and the Rig also replicates the production environment allowing you to run the JavaScript Helper locally.
Custom Environment
If you already have a development environment you are used to; you can adapt it to develop a Twitch Extension.
The most important thing is probably to be able to run the JavaScript Helper. To do so, I replicated the configuration of the Rig by adding
localhost.rig.twitch.tv
to my list of localhost domains. Your local environment should also use HTTPS to match the real context it’ll be run in.
Now you can simply run your local environment and configure your Twitch extension to use your local paths.
The JavaScript Helper
The JavaScript Helper is a simple script provided by Twitch that, once added to your extension code, gives you a great deal of information regarding the viewer and the channel the extension is running on.
To run the JavaScript Helper, make sure you have followed the steps listed above to setup your local environment then add https://extension-files.twitch.tv/helper/v1/twitch-ext.min.js to your list of scripts.
Take a quick look at the documentation first, it’s not very long and is sometimes not super comprehensive, but I’ll try to go through the essential features.
Event Listeners
.onAuthorized()
The event listener above gives you details like user ID and JWT of the user as well as the ID of the channel the extension is running on.
This JWT is particularly interesting when it comes to building your backend as it allows you to authenticate securely users coming from your extension.
.onContext()
The context event listener is also very handy. It gives you access to information such as the game being played, the language configured by the user on Twitch, and the state of the video player.
Actions
There are a couple of actions the JavaScript Helper allows you to perform.
.followChannel()
Follow Channel triggers a Twitch dialog inviting the user to follow the channel if that’s not already done. You can couple this action with its
.onFollow()
The Follow event listener to get a callback once the user has followed the stream or not.
.minimize()
Minimize simply hides your video component.
Configuration
The JavaScript Helper also allows you to store key/value data on three separate “segments”: broadcaster, developer, and global.
A few things to know:
- Extension clients can read data from the global segment.
- The broadcaster can read/write to the broadcaster segment.
- You are the only one in control of the developer segment.
- You can use the following configuration event listener to detect any changes made:
.configuration.onChanged()
Bits Donations
Bits Donations is a pretty exciting feature as it gives you a way to earn money through Bits donations made using your extension.
In your developer dashboard, you can create a list of products that your users can purchase using Bits.
The JavaScript Helper has a
.getProducts()
function that returns your list of products and a
.useBits()
that can be used to triggers a payment using Bits.
Additionally, you can use the
.showBitsBalance()
to trigger a Twitch dialog that displays the user’s Bits balance.
There are two event listeners you can use to get information after a Bits transaction:
onTransactionComplete()
is triggered when a user completes a transaction. It returns information about the transaction.
onTransactionCancelled()
is triggered when the transaction is canceled.
The Extension PubSub Channel
Your extension has its own PubSub channel accessible through the JavaScript Helper.
A message sent through this PubSub channel can be sent to 3 target topics: global, broadcast, and whisper-[userID].
A few things to know:
- Everyone can listen to the global and broadcast topics.
- You are the only one able to send on the global and whisper topics.
- Messages sent to the global topics are distributed to all clients using your extension on all channels.
- The broadcaster can send messages to the broadcast topic.
You can use the
.listen()
event listener to receive messages from the PubSub channel.
For the broadcaster, you can use the
.send()
function to send a PubSub message to the broadcast topic.
Building your back-end
Now that we have dealt with everything front-end related let’s dive into what can be done on the back-end side.
Authentication
As mentioned before, Twitch sends us a very useful JWT through the
.onAuthorized()
event listener. This token can be decoded and verified using your Extension secret.
Once decoded, the token gives you information such as the channel ID and the ID of the user interacting with the extension. You can then authenticate your users based on their Twitch ID.
The Twitch API
You may need to interact with the Twitch API to implement some cool features. That’s perfectly doable, although there are a few ways to go about it. But first, take a look at the documentation for the new API and version 5.

The JWT you received from your extension can be used to access specific endpoints, but the scopes covered by this token are limited.
To get access to specific scopes from your users, you have to implement the standard Twitch authentication flow. In my case, I implemented it as a part of the registration process. If we detect you don’t have an account using your Twitch ID in our database, we invite you to create an account by connecting to your Twitch account and allow us to access specific scopes.
If you would like to get an access token for your app to make requests to the API, you can generate an App Access Token using your Extension Client ID and your Extension Secret.
Send PubSub Messages
As mentioned before, you can send PubSub messages on any of the 3 topics we talked about earlier. PubSub messages is an expeditious and inexpensive way to send real-time data to your users.
To do so, you’ll need to get an access token using your Client ID and Extension Secret and post your request to the Extension PubSub endpoint. Nothing too complicated about that!
Now your front-end clients should receive your PubSub messages using the
.listen()
event listener accessible via the JavaScript Helper.
Webhooks
With Twitch’s API tight limit rate, it’s essential to implement options that reduce the number of requests sent to the API.
Webhooks are available for a few topics such as Follow, Subscribe, Bit Donation, and Stream Change.
Instead of polling the API every request or every X minutes, you can setup a webhook to listen for specific events. To do so, you’ll need to post your webhook to the Subscribe Webhook endpoint. You can also list your active subscription using the Webhook Subscriptions endpoint.
Note that Webhook subscriptions expire. You need to implement a solution to renew your subscriptions using a cronjob or a similar method.
TMI.JS
Alternatively, you can use a convenient Node.js package called TMI that connects directly to a channel’s chat to extract every possible event happening in the chat, such as messages, emotes, follows, subscriptions, hosts, bits donations and more.
This library uses WebSockets to connect to the Twitch Messaging Interface and get the messages posted there. You can join multiple chat channels at the same time up to a specific limit.
A cool implementation can be done by mixing Webhooks and TMI:
- When a Twitch channel registers in your backend, subscribe to the Stream Change webhook for this channel. This webhook is triggered when a stream goes online or offline.
- If the stream goes online, use TMI to join the channel’s chat and get events.
.join()
- When the stream goes offline, use leave to stop listening to events.
.leave()
Pretty cool, right? CoolCat
The Release Process
At the end of the day, an extension consists of a couple of HTML, CSS, and JS files. You can use a front-end framework like React, Vue.js, Angular, and more if you want to, but you don’t have to.
At first, your extension runs locally using the setup we talked about. You can test it directly on Twitch, but other people can’t access it because… well… it’s running locally.
Once you’re happy with your work, you can bundle your extension in a .zip file and upload it to run in Hosted mode. Twitch provides you with a staging environment that runs on their backend where you can test your app and whitelist other Twitch users to test it with you.
Finally, when you feel like you’re ready to publish your extension and make it available to everyone, you can submit it to be listed in the Extension Store!
During the next step, the very honorable members of the Twitch Extension Verification team review your app to make sure it is up to standards and respects the guidelines provided by Twitch. If everything is okay, you’ll be listed after a couple of days!
Now that you have a version of your app available to the public, you can create another version, and the process repeats itself from local to hosted and finally to prod.
That’s it for me, folks. I hope this short guide has been helpful!
I condensed quite a bit of information that is currently scattered in the very dense Twitch documentation.
I have to say that building an extension is a pretty fun experience. It’s great to see positive feedback coming from the community.
Now there are a few challenges to overcome. The first one is the extensive documentation (hopefully it’s clearer now!). The second is creating a service that is ready to be scaled. By publishing your extension on Twitch, you automatically have millions of potential customers between streamers and viewers. It’s a good problem to have for sure, but it’s essential to think ahead to avoid running into a bunch of issues.
Hopefully, you are now ready to develop your first extension! If you have any questions or feedback on this article, feel free to post in the comment section, and I’ll answer as soon as possible.
Thank you for reading and talk to you soon!
About Black Pug Studio
Black Pug Studio is a multidisciplinary creative agency in Galway crafting premium and uniquely tailored web design, branding, digital design, and software & web technology experiences.
We partner with companies to create their ideal business tools using the latest technologies available wrapped in beautifully designed interfaces.
Get in touch today and start building your project with us! We are looking forward to hearing from you.
Starting guide to build a Twitch Extension was originally published in Creative by Black Pug Studio on Medium, where people are continuing the conversation by highlighting and responding to this story.